Hi guys,
I’m putting a zenith 35/40 back together, and have a couple of questions about the vacuum diaphragm that operates the throttle on “Stage II”:
1.) Operation:
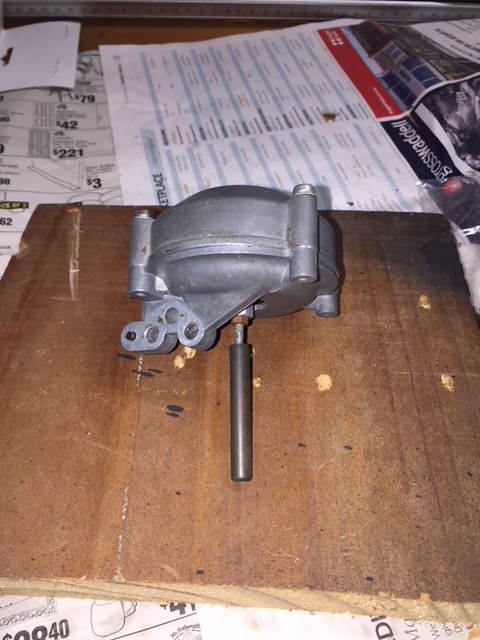
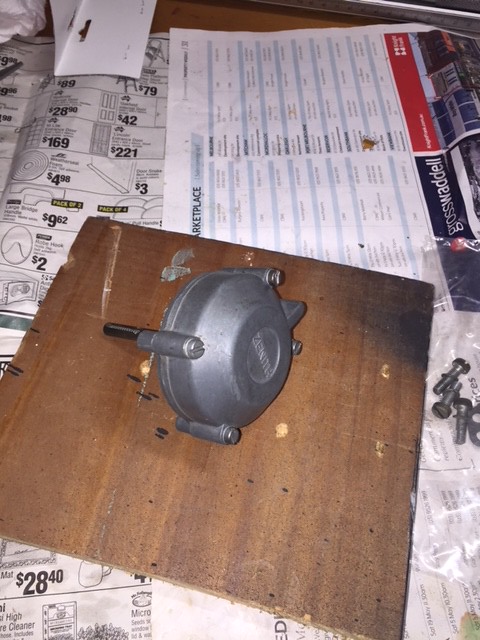
So my understanding is that there is a little hole inside stage I, that connects via a tunnel through the carb body, up to the top half of the diaphragm chamber. Once enough air is travelling through stage I a vacuum is created in this tunnel that sucks the top of the diaphragm upwards, operating a lever that opens the throttle on Stage II.
Have I got this right?
2.) Testing the vacuum:
Assuming I understand the operation correctly - I should be able to push the connecting rod on the bottom of diaphragm upwards, stick my finger over the little outlet hole on the chamber, and the diaphragm should stay up. I have done this a few times with mine and it appears there is a leak. I think it is around the seam where the two parts of the chamber body come together. Any suggestions how to fix this? Some kind of instant silicone gasket goop perhaps?
I am not very familiar with the Zenith carbs (I have solexes)
But if 2 surfaces do not seal (because of warping) you can flatten them in the following way:
Find an old mirror or a pane of glass. Stick on a sheet of sand paper (start with 240 grit)
Move the part over the sandpaper until you have touched the whole surface.
Do this for the opposite part
240 grit should be fine for vacuum but you could do it again with 400 and 600 wet n dry...
Try to avoid using silicone anywhere on your car. It promotes corrosion, looks horrible and any painting in the vicinity will become a nightmare.
If you need to add something to make it seal, use permatex aviation gasket in a jar.
Bart
1963 220 Sb Sedan "Kermit" (Australian Assembly)
1960 220 Sb Sedan "Zum Schlachten" (Early German Assembly, with a torsion bar spring for the bonnet) - Stored in Country WA
2012 W212 E250CDI
1981 Subaru Brumby 1.8 with Weber and 5-speed box "little utie" - Sold to another enthusiast!
2006 Ford Focus "daily driver"
2002 VW Passat V6 30V Station Wagon (SOLD - This car into a money pit)
2011 Kia Sportage "Missus commuter Bus"
2002 Mitsubishi Rosa Bus (converting it to a motor home)
Bartman4800 wrote: ↑Fri 27 Jul, 2018 2:52 pm
I am not very familiar with the Zenith carbs (I have solexes)
But if 2 surfaces do not seal (because of warping) you can flatten them in the following way:
Find an old mirror or a pane of glass. Stick on a sheet of sand paper (start with 240 grit)
Move the part over the sandpaper until you have touched the whole surface.
Do this for the opposite part
240 grit should be fine for vacuum but you could do it again with 400 and 600 wet n dry...
Try to avoid using silicone anywhere on your car. It promotes corrosion, looks horrible and any painting in the vicinity will become a nightmare.
If you need to add something to make it seal, use permatex aviation gasket in a jar.
Bart
Hey Bart,
Thanks for your reply. The culprit turned out to be the diaphragm itself. The new one supplied with my rebuild kit was made up of 3 x parts (2 metal bits that come together with the rubber diaphragm sandwiched between) Dropped a bead of instant gasket around the meeting edges of these parts and it did the trick!
Cheers,
Dan